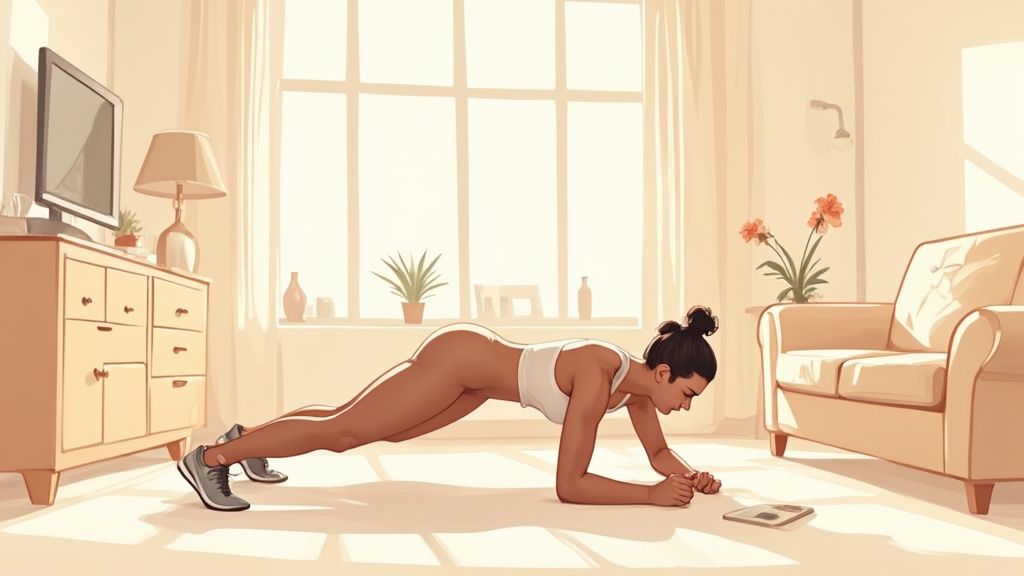
Ready to build a powerful chest and strong, defined triceps without ever stepping foot in a gym? You're in the right place. This guide is all about an effective at home chest and tricep workout that uses the bare essentials—your bodyweight and a few household items—to deliver serious results.
This isn't about complicated machines or heavy weights. It’s about smart, efficient training that works with your body's natural movement patterns. Forget the gym membership. Let's get started.
Why This Home Workout Just Works
Pairing your chest and tricep exercises isn't just a time-saver; it’s a smarter way to train. Think about it: any time you push something, from opening a heavy door to getting up off the floor, your chest and triceps work together as a team. This workout leverages that natural partnership to build coordinated, functional strength.
Your chest muscles (pectorals) are the primary movers in pressing exercises like the push-up, but you can't finish the movement without your triceps extending your elbows. By training them in the same session, you create a focused stimulus that encourages balanced muscle growth and strength gains.
The Bare Fitness Advantage
At Bare Fitness, we believe that fitness should be accessible to everyone, everywhere. You don’t need a room full of expensive equipment to build the body you want. This workout is built on that very principle.
- Efficient: By hitting two muscles that work together, you get a more intense and effective workout in less time.
- Functional: The strength you build translates directly to real-world activities, making everyday tasks easier.
- Accessible: Every exercise is chosen to be effective at home, requiring little to no special equipment.
This guide will walk you through everything you need for a successful at home chest and tricep workout, from warming up to cooling down, with simple, step-by-step instructions.
Your Weekly Workout Snapshot
Here’s a quick guide on how often to perform this workout based on your current fitness level. Remember, consistency is more important than frequency!
Listen to your body. As you get stronger, you can gradually increase the frequency or the total number of sets to continue making progress.
What You'll Need: The Bare Essentials
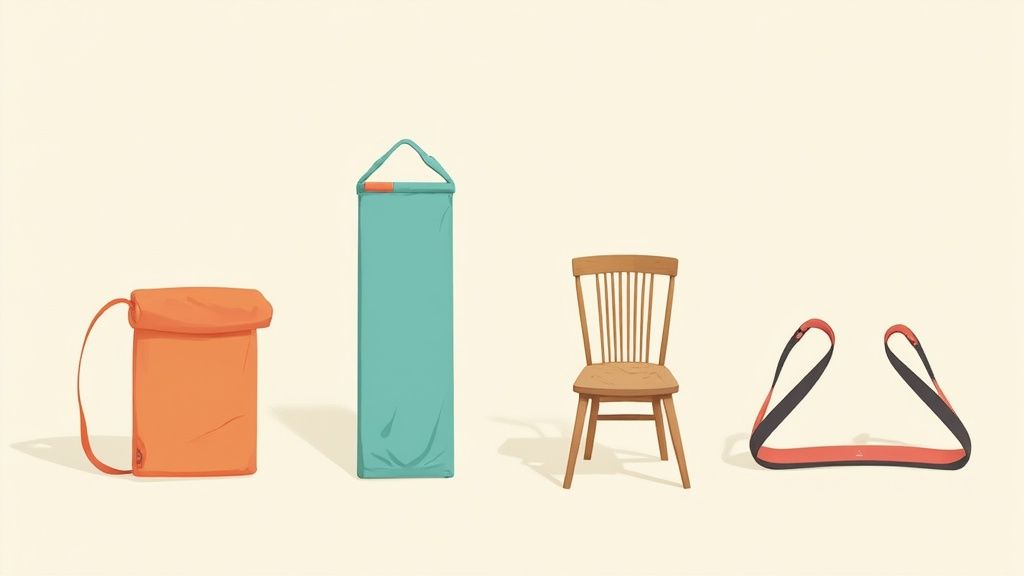
You don’t need a fancy home gym to get a great upper-body workout. Your most powerful tool is your own bodyweight. However, a few simple items can enhance your comfort and help you progress. Chances are, you already have what you need right at home.
The Must-Haves
- A Comfortable Surface: A yoga mat is perfect for cushioning your hands, knees, and back. No mat? A thick towel or a soft carpeted area works just as well.
- A Sturdy, Elevated Surface: You'll need something stable for exercises like incline push-ups and tricep dips. A sturdy chair, a workout bench, the edge of your sofa, or even a staircase can be perfect.
Safety First: Always test your surface before you start. Give it a push to make sure it won’t slip or wobble. Your safety is the top priority.
The Nice-to-Have
- Optional Resistance Bands: If you're looking to add a little extra challenge, a set of resistance bands is a fantastic, budget-friendly investment. They're versatile, easy to store, and perfect for increasing intensity.
Your Complete Home Chest and Tricep Routine
Ready to get to work? This routine is designed to be completed in under 45 minutes. The focus is on quality movement, not just counting reps.
But first, let's warm up! A few minutes of dynamic stretching—like arm circles, torso twists, and cat-cow stretches—will prepare your muscles and joints for the workout ahead. Don't skip it!
Research and fitness experts generally agree that aiming for 8 to 15 total sets per muscle group per week is a great target for building muscle. This workout is designed around that principle, using compound exercises that hit both the chest and triceps to give you the most efficient session possible. For more insights on training volume, the team at barbend.com offers some excellent analysis.
The Workout Structure
For each exercise, you'll see a target for sets (a group of repetitions) and reps (a single completion of an exercise). Rest for 60-90 seconds between each set. This allows your muscles to recover so you can give your best effort on the next one.
Remember: one perfect rep is better than ten sloppy ones. Focus on your form above all else.
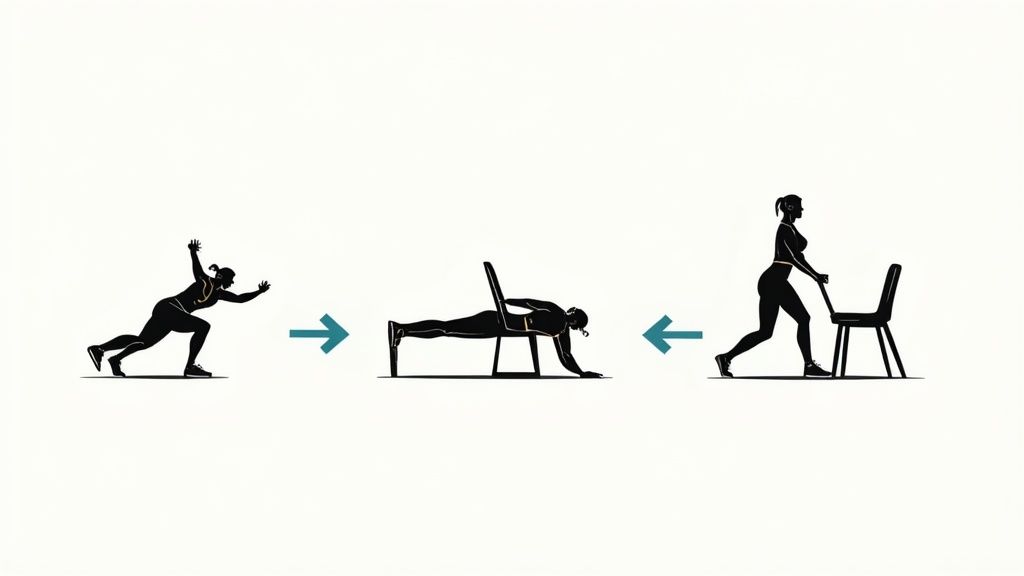
Exercise 1: Push-Up Variation
The push-up is the ultimate bodyweight exercise for your upper body, building foundational strength in your chest, triceps, and shoulders. Choose the variation that challenges you while allowing for good form.
Your Goal: 3 sets of 8-15 reps (or as many as you can with good form).
- Beginner (Incline Push-Up): Find a sturdy, elevated surface like a counter or the arm of a sofa. Place your hands on the surface and walk your feet back. Keep your body in a straight line from head to heels as you lower your chest and push back up. The higher the incline, the easier it will be.
- Intermediate (Standard Push-Up): Perform the classic push-up on the floor. Position your hands slightly wider than your shoulders, keep your core tight, and lower your chest to within a few inches of the ground.
- Advanced (Decline Push-Up): Increase the challenge by placing your feet on a chair or step with your hands on the floor. This shifts more emphasis to your upper chest and shoulders.
Exercise 2: Tricep Dips
Now, let's isolate those triceps. Dips are a fantastic way to build strength and definition in the back of your arms using just a chair or bench.
Your Goal: 3 sets of 10-15 reps.
- Sit on the edge of your chair or bench. Place your hands on the edge next to your hips, with your fingers pointing forward.
- Slide your hips forward, off the bench, supporting your weight with your arms. Keep your legs bent to make it easier or straighten them for a bigger challenge.
- Lower your body by bending your elbows until they reach about a 90-degree angle. Keep your back close to the bench as you move.
- Push through your palms to return to the starting position, squeezing your triceps at the top.
Exercise 3: Close-Grip Push-Up
This push-up variation shifts the focus dramatically to your triceps. It's a challenging move, but the payoff for arm strength and definition is massive.
Your Goal: 3 sets of as many reps as possible (AMRAP).
- How to Do It: Get into a push-up position, but place your hands directly under your shoulders or even slightly closer together.
- The Key Cue: As you lower your body, keep your elbows tucked in tight to your sides. Don't let them flare out. This is what isolates the triceps.
- Need a Modification? If this is too difficult from your toes, perform them from your knees or use an incline. The most important thing is keeping those elbows tucked in.
This straightforward yet powerful at home chest and tricep workout proves that consistency and proper form are the real keys to building strength.
Mastering Form and Avoiding Common Mistakes
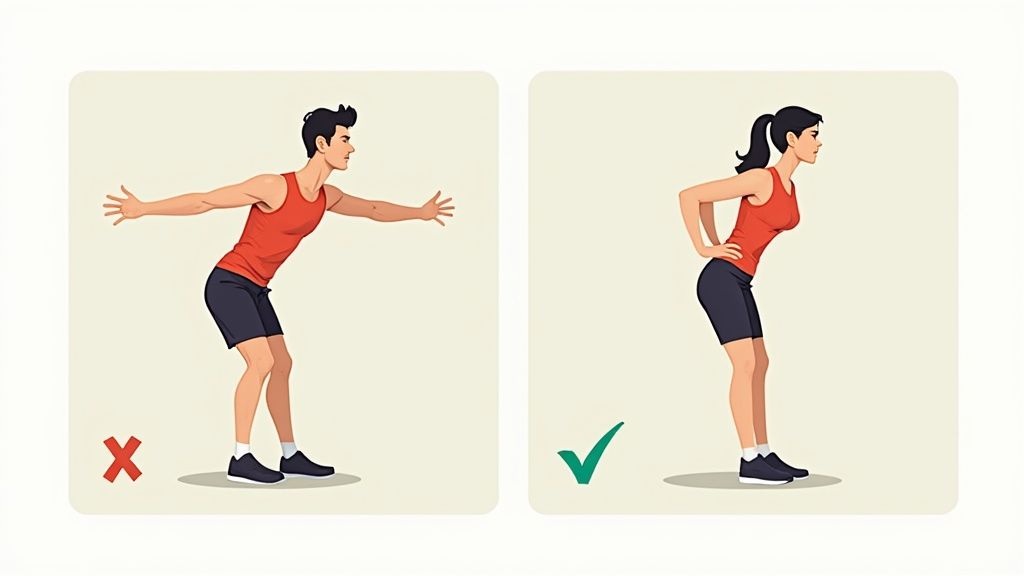
Great results and injury prevention come down to one thing: good form. Let’s break down the most common mistakes people make during an at home chest and tricep workout and how to fix them with simple, actionable cues.
Fixing Your Push-Up Form
The push-up is a full-body exercise, but a few small errors can sideline your progress and strain your shoulders or lower back.
The Mistake: Flaring Your Elbows Out Wide
Many people let their elbows point directly out to the sides, creating a "T" shape with their body. This puts unnecessary stress on the shoulder joints.The Fix: Create an Arrow Shape
Tuck your elbows so they point back at about a 45-degree angle from your body. From above, your arms and torso should look like an arrow, not a "T." This engages your back muscles for stability and directs the force through your chest and triceps.The Mistake: A Sagging or Piking Core
Letting your hips droop toward the floor means your lower back is taking over for your abs. Pushing your butt into the air takes the load off your chest. Both cheat you out of a good rep.The Fix: Squeeze Your Glutes and Brace Your Abs
Before you start a rep, tighten your glutes and brace your core as if you're about to be poked in the stomach. This locks your spine into a safe, powerful, and straight line.
Perfecting Your Tricep Dips
Dips are amazing for your triceps, but they require careful attention to your shoulder position to be safe and effective.
The Mistake: Letting Your Shoulders Roll Forward
This is the most common error. It can increase the risk of shoulder injury and takes the focus off your triceps.The Fix: Use This Checklist
Before each rep, quickly check these three points:- Chest Up: Imagine a string pulling your chest toward the ceiling.
- Shoulders Back and Down: Pull your shoulder blades together and away from your ears.
- Stay Close: Keep your back as close as possible to the bench or chair as you move up and down.
- Add More Reps: If you did 10 push-ups per set last week, aim for 11 or 12 this week.
- Add Another Set: Once you can comfortably hit your target reps for all sets, add an extra set to that exercise.
- Decrease Your Rest Time: Shorten your rest periods between sets by 10-15 seconds. This increases the intensity without changing the exercise.
- Advance the Exercise: Once you master a variation, move to a harder one. Progress from incline push-ups to floor push-ups, or from floor push-ups to decline push-ups.
- Do as many standard push-ups as you can.
- As soon as you finish, immediately drop to your knees and do as many more push-ups as you can.
- Slow down your reps (e.g., take 3-4 seconds to lower yourself in a push-up).
- Add more reps or sets.
- Choose a more difficult exercise variation.
- Improved Form: Are your movements becoming cleaner and more controlled?
- Increased Strength: Can you do more reps than you could last week?
- Easier Daily Life: Are tasks like carrying groceries or lifting objects feeling less difficult?
Running through this simple checklist ensures your triceps do the work, making every rep count.
How to Progress and Keep Getting Stronger
https://www.youtube.com/embed/A6gBdOQht3U
Eventually, your workout will start to feel easier. That's a great sign! It means you're getting stronger. To keep making progress, however, you need to continue challenging your muscles. This is called progressive overload—the key to long-term strength and muscle growth. It simply means finding ways to make your workouts a little harder over time.
Smart Ways to Increase the Challenge
You don't need weights to apply progressive overload. Here are a few simple methods perfect for any at home chest and tricep workout:
Level Up with Intensity Techniques
A drop set is a fantastic intensity technique you can use at home. You perform an exercise to failure (the point where you can't do another rep with good form), then immediately switch to an easier version of that exercise with no rest.
For example:
This technique pushes your muscles beyond their normal limits, sending a powerful signal to grow stronger. A 2021 study on triceps training found that drop sets led to muscle growth of about 10% compared to only 5% with traditional sets—and in less time. It’s an incredibly efficient tool for home workouts. If you’re interested in the science, you can read the full research study.
Your Questions Answered: Home Chest & Tricep Workouts
It's natural to have questions when starting a new routine. Here are clear, no-nonsense answers to the most common ones I hear about this at-home chest and tricep workout.
How Often Should I Do This Workout?
For beginners, doing this workout once a week is a great starting point. It gives your body ample time to recover and adapt. If you have some experience or after a few weeks, you can increase the frequency to twice a week. Just be sure to allow at least 48 hours of rest between sessions for your muscles to repair and grow.
Consistency is key. One great workout every week is far better than three intense sessions one week followed by two weeks off.
Can I Actually Build Muscle With Just My Bodyweight?
Absolutely! Your muscles don't know the difference between a dumbbell and your bodyweight; they only understand resistance. As long as you continue to challenge them through progressive overload, they will adapt and grow. You can build a strong, defined upper body without ever lifting a weight.
To increase the challenge with bodyweight exercises, you can:
What If I Can’t Even Do One Push-Up?
That's a very common starting point, and there’s nothing to be discouraged about. The best way to get your first push-up is to start with incline push-ups.
Find a high, sturdy surface like a kitchen counter or the back of a sofa. The higher the surface, the easier the exercise. As you get stronger, gradually move to lower surfaces—a desk, then a chair, then a low step—until you’re finally ready for the floor. This method safely builds the strength you need to achieve your first full push-up.
Should I Be Sore After Every Single Workout?
Some muscle soreness (known as Delayed Onset Muscle Soreness, or DOMS) is normal, especially when you're new to an exercise. However, being extremely sore after every workout is not the goal. It often means you're pushing too hard or not recovering properly.
The best measure of a successful workout isn't how sore you are. Instead, track your progress by noticing:
Listen to your body, focus on great form, and let your progress—not your pain—be your guide.
At Bare Fitness, our mission is to make fitness straightforward and achievable. We focus on effective, equipment-free workouts designed to fit into your life. To find more practical guides and routines, check out what we're doing at https://barefitness.com.
More from
Lifestyle
category