Tired of tripping over dumbbells in a living room that has zero space for a real workout? You're not alone. The solution isn't a bigger home or a pricey gym membership—it's looking up. Wall mounted fitness equipment is the game-changing answer for creating a powerful, minimalist home gym without sacrificing your precious floor space.
Reclaim Your Space with Smart Home Fitness
Let’s be honest: the biggest hurdle to working out at home is often the space itself. It’s hard to get motivated when you're navigating around furniture or a makeshift home office. This is where the magic of "going vertical" comes into play.
By using your walls, you unlock the full potential of any room, turning it into a functional workout zone in seconds. Think of it like swapping a bulky bookcase for sleek, floating shelves. You get all the function without the clutter.
What This Guide Will Cover
We built this guide to be your complete roadmap, from dreaming about a home gym to crushing your first workout in it. We'll skip the complicated jargon and focus on practical, actionable steps that stick to our "bare essentials" philosophy.
Here’s what you can expect to learn:
- The Benefits of Going Vertical: We'll dive into how wall mounted fitness equipment does more than just save space—it creates a safer, more motivating environment.
- Exploring Your Options: Discover the different types of gear out there, from simple pull-up bars to versatile cable systems, and find what actually fits your routine.
- Choosing the Perfect Setup: Learn how to pick equipment based on your personal fitness goals, your budget, and the specific walls you're working with.
- Safe Installation and Care: We'll give you clear, step-by-step advice for securely installing your gear and keeping it in top shape.
Our goal is simple: to show you that a seriously effective home gym is within reach, no matter the size of your space or where you are in your fitness journey. Let's get started.
Why Going Vertical Transforms Your Home Gym
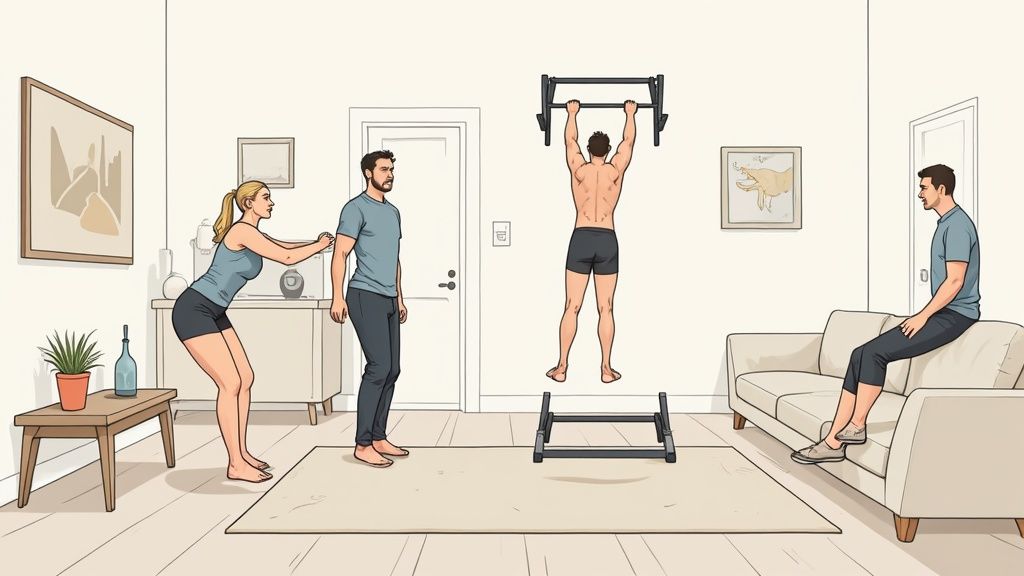
Choosing wall mounted fitness equipment isn't just a neat storage trick; it’s a strategic decision to reclaim your living space and seriously upgrade your training. Think about it: a massive, freestanding weight rack eats up a huge chunk of your floor, while wall-mounted gear leaves your room feeling open and usable.
Almost instantly, you multiply your workout area. With equipment living on the walls, your floor is suddenly clear for anything from yoga and HIIT circuits to just stretching out. No more awkwardly dragging a weight bench out of the way to do a set of burpees.
A Safer and More Focused Workout Zone
A cluttered floor isn't just annoying—it's a safety hazard. Loose dumbbells, kettlebells, and other gear are trip hazards just waiting to happen, and an injury can completely derail your progress.
By mounting your equipment securely, you create a dedicated, organized, and far safer workout environment. This has a huge psychological benefit, too. A clean, organized space helps clear your mind, making it easier to get started and stay focused on your workout without distractions. Everything is in its place, ready to go when you are.
Your workout space should inspire movement, not create obstacles. A clear floor and organized equipment turn a corner of a room into a genuine fitness sanctuary, making your workouts feel intentional and focused.
The Smart Investment in Your Health
Beyond just saving space, investing in wall mounted fitness equipment is a savvy financial move. The one-time cost for a quality setup often comes in at less than what you’d pay for a single year's gym membership. When you factor in the long-term savings for a couple or a family, the value is impossible to ignore.
This isn't just a niche idea; it's part of a huge shift toward practical, effective home fitness. The global home fitness equipment market was valued at USD 11.73 billion in 2024 and is set to continue climbing, as more people look for better ways to stay active at home. You can find more insights into this growing market on IMARC Group.
Ultimately, the biggest win is the sheer convenience. No commute, no waiting for a squat rack, and no closing time. Your personal gym is open 24/7, which demolishes one of the biggest hurdles to building a consistent routine. That accessibility is what the Bare Fitness philosophy is all about—getting you maximum results with minimal fuss.
Discover Your Perfect Wall-Mounted Gym Setup
Alright, this is the fun part—picking out your equipment. It's easy to get lost in all the options out there, so let's break it down into a few clear categories. Think of this as your personal shopping guide to finding the wall-mounted fitness equipment that clicks with your goals, your space, and your workout style.
This simple diagram maps out the main types of gear by what they do best, whether you're focused on bodyweight strength, serious lifting, or just want something that can do a little bit of everything.
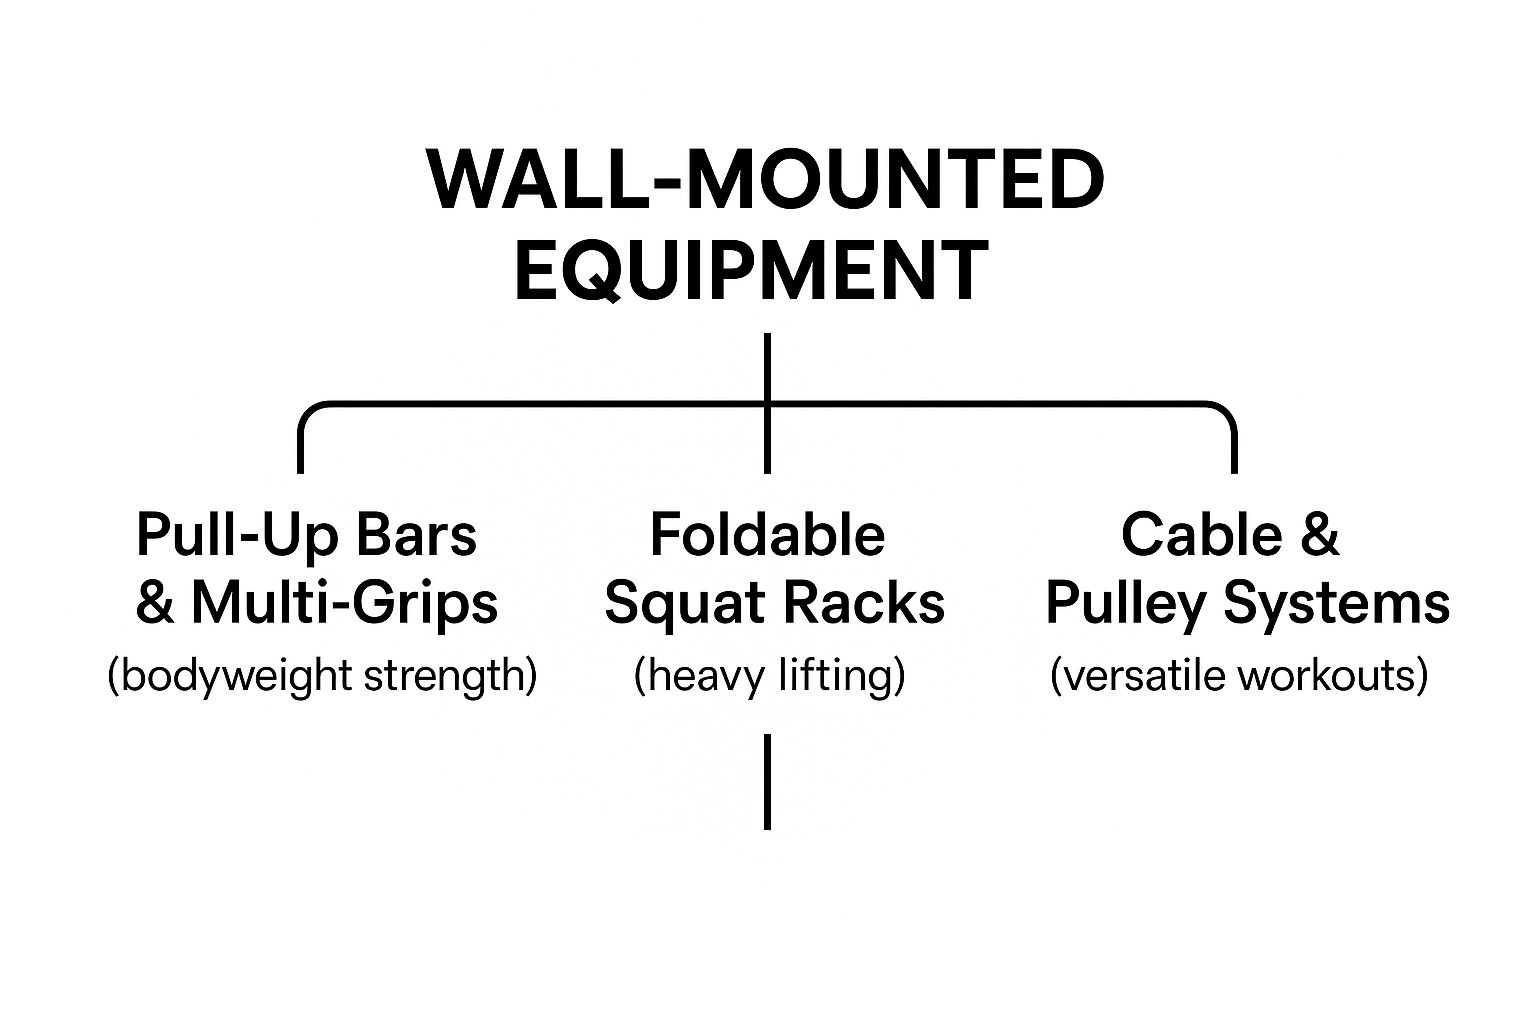
As you can see, each piece has its own specialty. Knowing what you want to achieve is the first step in figuring out which one belongs on your wall.
Pull-Up Bars and Multi-Grips
Let's start with a classic. The pull-up bar is the undisputed king of bodyweight training for a reason. It’s simple, effective, and the bedrock for building real-world upper-body and core strength. Multi-grip versions let you switch up your hand positions, allowing you to hit different muscle groups with chin-ups, wide-grip pull-ups, and everything in between.
- Key Exercises: Pull-ups, chin-ups, hanging leg raises, toes-to-bar.
- Best For: Beginners and intermediates who want to master functional, bodyweight strength.
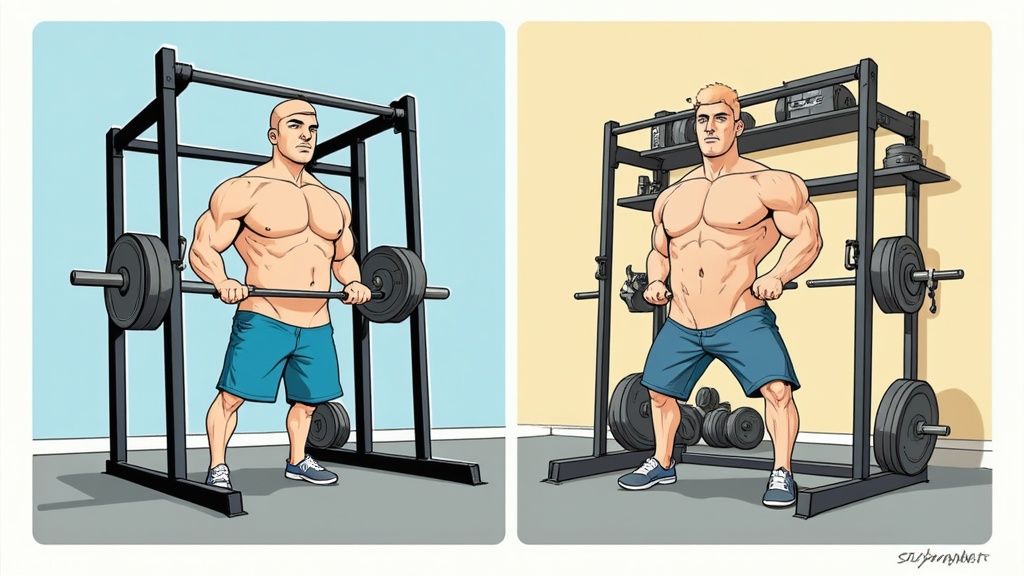
Foldable Squat Racks
If you’re serious about lifting, a foldable squat rack is your best friend. This brilliant piece of engineering gives you all the safety of a traditional power rack but folds away nearly flat against the wall when you're done. This means you can safely load up the barbell for squats and bench presses without permanently surrendering your room to the gym.
- Key Exercises: Barbell squats, bench presses, overhead presses, rack pulls.
- Best For: Intermediate to advanced lifters who need a secure setup for heavy barbell work.
Cable and Pulley Systems
For sheer versatility, nothing comes close to a wall-mounted cable or pulley system. These setups bring the feel of a commercial gym right into your home, letting you perform dozens of different isolation and compound exercises. You can hit virtually any muscle from any angle, making them a fantastic all-in-one solution if you crave variety.
- Key Exercises: Triceps pushdowns, bicep curls, cable crossovers, lat pulldowns, seated rows.
- Best For: Anyone wanting a well-rounded, full-body workout experience that mimics a commercial gym.
Wall Anchors for Resistance Bands
Sometimes the simplest tool is the most effective. The humble wall anchor might be the most accessible piece of wall-mounted fitness equipment you can buy. These small, sturdy hooks let you attach resistance bands at any height, transforming a simple set of bands into a powerful training tool for your entire body. They're perfect for warm-ups, strength work, and physical therapy exercises.
- Key Exercises: Banded rows, chest presses, pallof presses, hamstring curls.
- Best For: Beginners, anyone on a tight budget, or those looking for a low-impact, highly versatile training option.
Interactive Smart Fitness Mirrors
Sitting at the intersection of technology and fitness, smart mirrors look like stylish, full-length mirrors when off. Switch one on, and it comes alive with on-demand fitness classes and virtual personal trainers. It’s no surprise the smart fitness mirror market was valued at USD 338.7 million in 2024—people clearly love blending high-tech function with home decor. You can dig into this trend by checking out these market growth insights on Gminsights.com.
- Key Exercises: Guided HIIT, yoga, strength training, and cardio classes.
- Best For: People who thrive on the energy of group classes and virtual coaching, and want a premium, guided workout experience.
How to Choose Equipment That Fits Your Goals
Picking the right wall mounted fitness equipment can feel a bit overwhelming. The secret isn't to just start browsing—it's about taking a minute to figure out exactly what you need first. Let's make sure you're getting the perfect piece of equipment for your fitness journey, not someone else's.
Start with Your Fitness Goals
First things first: what are you trying to accomplish? Your "why" is the single most important factor, as it will immediately point you toward the right gear. Be real with yourself about what gets you excited to move.
- Building Strength: If your mission is to build serious muscle and get progressively stronger, a foldable squat rack is a game-changer. For anyone focused on mastering their own bodyweight, a multi-grip pull-up bar is a non-negotiable staple.
- Improving Overall Fitness: Maybe you want a little bit of everything—some strength, some cardio, and better flexibility. In that case, something super versatile like a wall mounted cable system or a set of simple wall anchors for resistance bands will give you endless workout possibilities.
- Guided Workouts: Do you feed off the energy of a live class and need an instructor to push you? An interactive smart fitness mirror is your perfect match. It brings that high-energy studio vibe right onto your wall.
To help you connect the dots, here’s a quick rundown of which gear aligns with common fitness goals.
Matching Wall Mounted Gear to Your Fitness Goals
Ultimately, the best equipment is the kind you'll be excited to use day after day.
Measure Your Space and Walls
Okay, now it’s time to grab a tape measure. This step is crucial. Guessing your dimensions is a recipe for disaster when it comes to wall mounted fitness equipment. You need to know the exact height, width, and depth of the wall you plan to use.
And don't forget to look up! Ceiling height is a big deal. You need enough clearance to do a pull-up or press a barbell overhead without putting a hole in the ceiling. Just as important is knowing what's inside your walls. Most equipment needs to be drilled directly into solid wood studs or a concrete wall to be safe. A stud finder is your best friend here—don't even think about starting without one.
Set a Realistic Budget
Finally, let's talk money. You need to decide what you're comfortable investing in your health. The good news is there are fantastic options at almost every price point. You can get an incredibly effective workout setup for a small investment using wall anchors and a good set of resistance bands.
If you have a bit more to spend, you can start looking at more advanced setups like foldable racks or full pulley systems. Just remember, the "best" equipment isn't always the most expensive. It’s the one that matches your goals, fits your space, and gets you moving consistently.
Your Pre-Purchase Checklist
Run through these questions to make sure you're on the right track:
- Goal: Am I aiming for heavy lifts, bodyweight mastery, or all-around fitness?
- Space: Have I measured my wall, floor space, and ceiling height?
- Structure: Do I know where my studs are, or do I have a solid concrete wall?
- Budget: What's the absolute maximum I want to spend on this?
- Enjoyment: Honestly, which of these exercises will I actually want to do a few times a week?
A Guide to Safe DIY Installation and Care
You’ve picked out the perfect piece of gear, and now for the most critical part: installing it safely. Getting your wall-mounted fitness equipment up properly is non-negotiable, but don't let that intimidate you. With the right tools and a bit of patience, you can create a rock-solid setup you can trust for every workout.
Think of it as the first step in building your own personal fitness space. Let's walk through it together.
What You'll Need
First things first, let's gather your toolkit. Having everything on hand before you start makes the whole process smoother and keeps frustration at bay.
- A stud finder: This is your best friend. It’s the only way to find the strong wooden beams inside your walls that will securely anchor your equipment.
- A power drill: For drilling pilot holes and driving in the heavy-duty bolts.
- A level: Absolutely essential for making sure your equipment is perfectly straight.
- A socket wrench: For tightening bolts down so they are completely secure.
- A pencil: For marking your exact drill spots.
- All included hardware: Keep the nuts, bolts, and washers that came with your equipment together and double-check you have every piece.
Simple Steps for a Secure Installation
Ready to get started? Follow these steps carefully for a safe, sturdy installation.
- Find Those Studs: Grab your stud finder and slide it across the wall where you plan to mount your equipment. When it beeps, you’ve found a stud. Mark the center of each one with your pencil. In most homes, studs are 16 inches apart, so you can measure between them to confirm.
- Mark Your Drill Points: Hold the equipment up against the wall, lining up its mounting holes with your stud marks. Use your level to get it perfectly horizontal or vertical. Once it's in position, mark where you need to drill.
- Drill Pilot Holes: At each pencil mark, drill a small "pilot" hole. This simple step makes it much easier to drive the large bolts in and prevents the wooden stud from splitting under pressure.
- Fasten the Gear Securely: Ask a friend to help you hold the equipment in place. Drive the lag bolts through the mounting holes and into your pilot holes. Use your socket wrench to tighten them down until they are completely snug. The goal is absolutely no wiggle or movement.
Know When to Call a Professional
Part of any successful project is knowing your limits. If you feel unsure at any point—maybe you have tricky plaster walls, or you just can't confidently locate the studs—the smartest and safest move is to hire a professional. Nothing is more important than your safety.
Safety First, Always: The single biggest mistake people make is mounting heavy equipment directly into drywall. Drywall alone will fail; it simply cannot support your body weight during a workout. You must always anchor into solid wood studs or concrete.
Long-Term Care and Maintenance
Your job isn't quite done once the equipment is on the wall. To keep your wall-mounted fitness equipment in top shape for years to come, give it a quick check-up once a month.
- Check all bolts and screws: Give them a quick turn with a wrench to make sure nothing has loosened up over time.
- Wipe down all surfaces: Use a simple cleaner to prevent rust and keep your gear looking fresh.
- Inspect for wear and tear: Look at any cables, bands, or moving parts for signs of fraying or cracking.
This simple routine takes just a few minutes but ensures your home gym remains a safe and effective place to hit your goals.
Your First Workout and Next Steps

You've done the research and picked your gear. Now it’s time to actually get moving—this is where the fun begins. You don't need a complicated setup to get an incredible workout. All it takes to start is a simple wall anchor and a good set of resistance bands.
What You'll Need
- A securely installed wall anchor
- A set of resistance bands with handles
- A water bottle and a positive attitude!
Your First Wall-Mounted Workout
Here’s a straightforward, full-body routine you can do right now. The goal is 3 rounds, with a 60-second rest in between. Concentrate on keeping your movements slow and controlled, not just rushing through them.
Banded Rows (12 reps): Face your anchor, grab the band handles with palms facing each other. Pull your elbows straight back, squeezing your shoulder blades together. Keep your core tight and back straight.
Banded Chest Press (12 reps): Loop the band around your anchor at chest height. Face away from the wall, grab the handles, and press forward until your arms are straight. Control the movement as you return to the start.
Banded Squats (12 reps): Stand on the band with both feet, then loop the other end over your shoulders. Squat down like you're sitting in a chair, keeping your chest up and your weight in your heels.
Banded Pallof Press (10 reps per side): Stand with your side to the anchor and hold the band with both hands at your chest. Press your hands straight out from your body, fighting the urge to let the band twist you. This is a fantastic core stability exercise.
Progression and Tracking
- To make it harder: Use a heavier resistance band or add a few more reps to each set.
- To make it easier: Use a lighter band or reduce your reps.
- Track your progress: Keep a simple log of which bands you used and how many reps you completed. Next week, try to beat it!
What Comes Next
Getting your equipment installed and doing that first workout is a huge step, but it’s just the beginning. The fitness world is shifting toward smart, compact strength gear that fits into real-world spaces. You can see more about home fitness equipment trends at Mordor Intelligence.
Ready to keep the momentum going? Check out some of our other guides to expand your routine:
- Our Favorite Resistance Band Exercises
- A 15-Minute Full Body Workout
Building a home gym that gets you real results doesn't have to be a massive project. You've got everything you need to start making progress today.
Got Questions? Let's Talk Wall-Mounted Gear
It’s completely normal to have questions before you start drilling holes in your walls. Let's walk through some of the most common concerns about wall mounted fitness equipment so you can get started with confidence.
Can I Safely Use This in an Apartment?
For the most part, yes—but you have to do your homework first. Before you do anything else, check your lease agreement. Many landlords are fine with you drilling into the walls, provided you patch and paint everything back to normal when you leave. The biggest safety issue is the wall itself. You must anchor the equipment directly into solid wood studs. Drywall is basically compressed paper—it won’t hold you, let alone a set of weights.
How Much Weight Can This Equipment Handle?
That depends on the specific piece of gear. A well-made pull-up bar might be rated for 300 lbs, while a serious foldable squat rack can often handle over 500 lbs. But here’s the crucial part: those numbers mean nothing if the installation is sloppy. The real strength of your setup comes from how well it's anchored to the wall studs. Always stick to the manufacturer's instructions to the letter and never push past the official weight limit.
Your equipment is only as strong as its installation. Taking the time to find studs and use the correct hardware isn't just a suggestion—it's the most important step for ensuring your safety.
I'm a Complete Beginner. What's the Best Thing to Start With?
If you're just dipping your toes into fitness, you can't go wrong with a simple wall anchor system for resistance bands. It's an incredibly versatile, low-cost way to get into strength training without a huge commitment. With a set of anchors and a few bands, you can do dozens of exercises for your entire body. The best part? You can easily make things easier or harder just by switching to a different band. It’s the perfect tool for building that initial foundation of strength.
Ready to find the perfect gear to start your vertical fitness journey? Bare Fitness has everything you need to build a powerful, space-saving home gym. Explore our minimalist fitness solutions at https://barefitness.com.
More from
Lifestyle
category