Welcome to your ultimate guide for building strong, defined, and healthy shoulders. Forget the complicated machines and intimidating routines. Here at Bare Fitness, we believe in the power of the essentials: effective movements you can perform with minimal equipment for maximum results. We are stripping away the complexity to focus on what truly works, providing a clear path to achieving your goals.
Strong, well-developed shoulders are more than just an aesthetic goal. They are fundamental to your overall physical health and functional strength. They support better posture, especially if you work from home or spend hours at a desk, and they play a crucial role in preventing injuries in your neck, back, and rotator cuffs. This functional strength translates directly into daily activities, making everything from carrying groceries to lifting your kids feel easier and safer. Before diving into specific exercises, understanding the importance of strength training can enhance your overall fitness journey and provide context for why these movements are so powerful.
This article breaks down the 8 best shoulder exercises for women, meticulously selected for their effectiveness and accessibility. We'll guide you through each one, covering:
- Step-by-step instructions for perfect form.
- Common mistakes to avoid for safety and efficiency.
- Progression and modification options to suit any fitness level.
Whether you're a busy professional, a mom on the go, or just starting your fitness journey, this list is designed for you. Ready to sculpt shoulders you can be proud of? Let's get started.
1. Push-ups (Shoulder-focused variations)
Often dismissed as just a chest exercise, the humble push-up is one of the most effective and accessible best shoulder exercises for women. This bodyweight powerhouse builds functional strength that translates directly into everyday activities, like lifting a child or putting a heavy box on a high shelf. It requires zero equipment and strengthens not just your shoulders, but also your chest, triceps, and core simultaneously.
Push-ups are a cornerstone of effective fitness because they build incredible upper body stability and power. The primary shoulder muscle targeted is the anterior deltoid (the front of your shoulder), which is crucial for pushing movements. It also heavily engages the serratus anterior, a key muscle for shoulder blade health, and the rotator cuff muscles, which stabilize the entire shoulder joint.
How to Perform a Shoulder-Focused Push-up
To maximize shoulder engagement, it’s all about proper form. Start with a variation that allows you to complete 8-12 reps without compromising your technique.
What You'll Need:
- Your own bodyweight
- An elevated surface like a countertop, sturdy table, or bench (for incline variations)
Step-by-Step Instructions:
- Get into Position: Place your hands slightly wider than your shoulders on the floor or an elevated surface. Your body should form a straight line from your head to your heels (or knees, if modifying).
- Engage Your Core: Brace your abdominal muscles and squeeze your glutes. This prevents your hips from sagging and protects your lower back.
- The Descent: Slowly lower your chest toward the floor, keeping your elbows tucked at a 45-degree angle from your body, not flared out to the sides. This angle protects the shoulder joint and increases muscle activation.
- The Push: Powerfully press through your palms to return to the starting position. Focus on driving the floor away from you.
Key Insight: The 45-degree elbow tuck is non-negotiable for shoulder health. Flaring your elbows out to 90 degrees can place excessive strain on the shoulder joint, increasing the risk of injury.
Modifications and Progressions
- Beginner (Incline Push-ups): Start by placing your hands on a wall, then progress to a countertop, and then a low bench. The higher the incline, the easier the exercise.
- Intermediate (Knee Push-ups): Perform the movement on your knees to reduce the amount of bodyweight you are lifting.
- Advanced (Wide-Grip or Diamond Push-ups): Once you master the standard form, try placing your hands wider to hit the chest more or closer together (diamond) to target the triceps and inner chest. These variations challenge your shoulder stability in new ways.
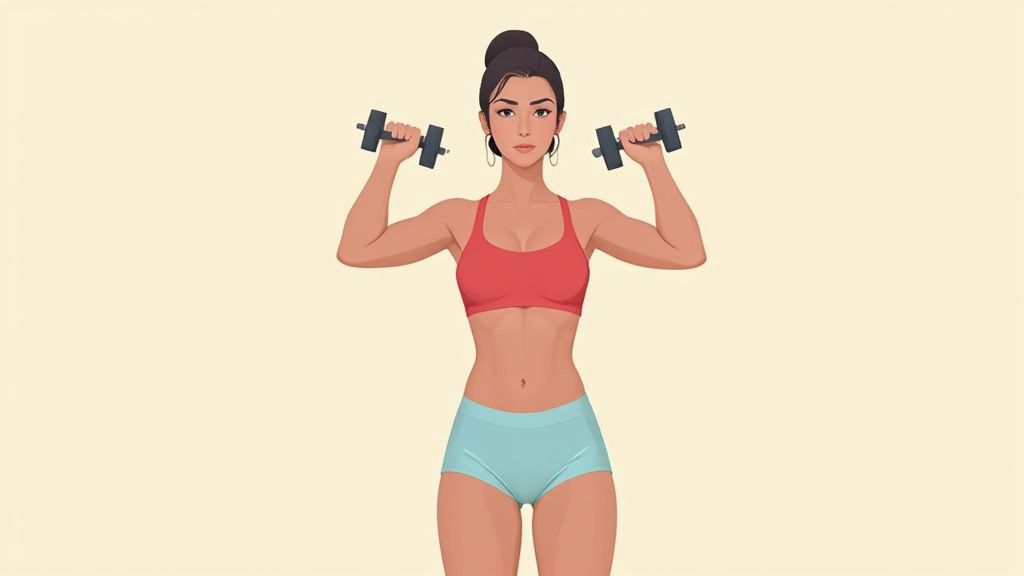
2. Dumbbell Shoulder Press
The dumbbell shoulder press is a foundational movement and undeniably one of the best shoulder exercises for women. This classic lift directly targets the deltoids to build strength, definition, and stability. Unlike barbell presses, dumbbells force each arm to work independently, highlighting and correcting strength imbalances while allowing for a more natural and joint-friendly range of motion.
This exercise works the anterior and medial deltoids (front and side of your shoulders), with strong support from the triceps and upper chest. It directly translates to real-world strength, like lifting luggage into an overhead bin.
How to Perform a Dumbbell Shoulder Press
Proper form is crucial to protect your joints and maximize muscle engagement. Choose a weight that allows you to complete 8-10 reps with control and good technique.
What You'll Need:
- A pair of dumbbells
- A bench with back support (optional, but recommended for stability) or a sturdy chair
Step-by-Step Instructions:
- Get into Position: Sit on a bench or chair with your back straight and feet planted firmly on the floor. Hold a dumbbell in each hand at shoulder height, with your palms facing forward and elbows bent at a 90-degree angle.
- Engage Your Core: Brace your core to create a stable base and prevent your lower back from arching excessively. Keep your chest up and shoulders pulled back and down.
- The Press: Exhale as you press the dumbbells directly overhead until your arms are fully extended but not locked. The dumbbells should follow a path that brings them slightly closer together at the top.
- The Descent: Inhale and slowly lower the dumbbells back to the starting position at your shoulders with full control. Don't let gravity do the work.
Key Insight: Avoid pressing the weights straight out to your sides. Instead, keep your elbows slightly in front of your body in the "scapular plane." This is a more natural and safer position for the shoulder joint, reducing the risk of impingement.
Modifications and Progressions
- Beginner (Seated or Alternating Press): Performing the exercise while seated provides more stability. You can also press one arm at a time (alternating press) to focus on form and core engagement.
- Intermediate (Standing Dumbbell Press): Once you've mastered the seated version, performing the press while standing requires significantly more core stability to keep your torso rigid.
- Advanced (Arnold Press): This variation incorporates a rotational movement that hits all three heads of the deltoid, adding a new layer of complexity and muscle recruitment.
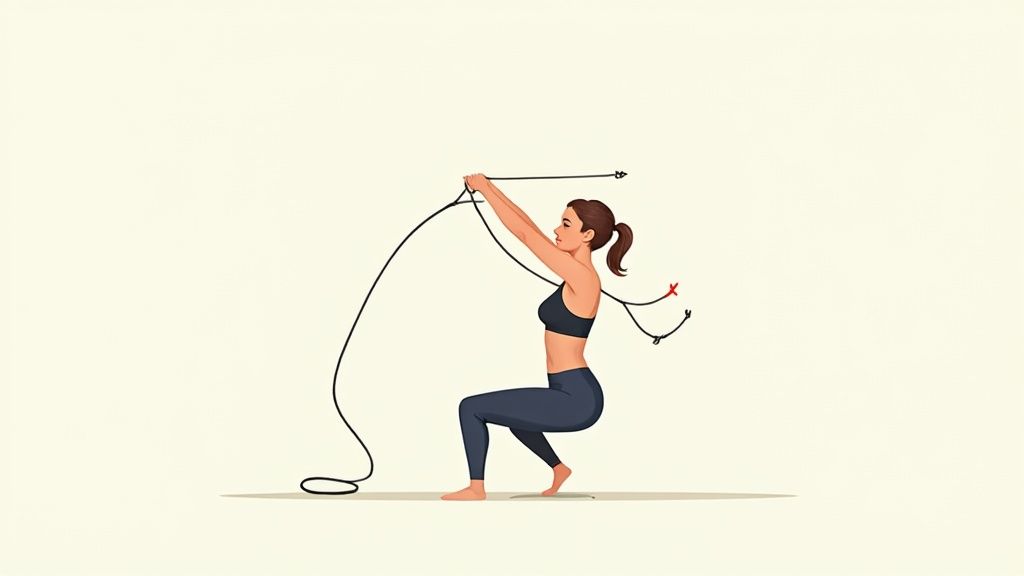
3. Resistance Band Pull-Aparts
Often overlooked, the resistance band pull-apart is secretly one of the best shoulder exercises for women, especially for building healthy, resilient shoulders. This simple, low-impact movement is a powerhouse for correcting posture and strengthening the often-neglected muscles of the upper back and rear shoulders. It’s an essential tool for counteracting the forward-slouching posture many of us develop from working at a desk or looking at our phones.
This exercise is a staple in physical therapy and a favorite warm-up for elite weightlifters for good reason. It specifically targets the posterior deltoids (the back of your shoulders) and key scapular stabilizers like the rhomboids and middle trapezius. Strengthening these muscles helps pull your shoulders back into proper alignment, creating a stronger, more confident posture and reducing the risk of shoulder impingement.
How to Perform a Resistance Band Pull-Apart
The goal is controlled movement, not just stretching the band as far as possible. Focus on feeling the muscles between your shoulder blades do the work.
What You'll Need:
- A light-to-medium resistance band (loop or theraband style)
Step-by-Step Instructions:
- Get into Position: Stand tall with your feet shoulder-width apart, engaging your core and glutes to create a stable base. Hold the resistance band with both hands using an overhand grip, about shoulder-width apart.
- Set Your Arms: Extend your arms straight out in front of you at chest height, parallel to the floor. Keep a slight bend in your elbows to avoid locking them out.
- The Pull: Keeping your arms straight, initiate the movement by squeezing your shoulder blades together. Pull the band apart, moving your hands outward until your arms form a "T" shape with your body.
- The Squeeze and Return: Pause for a moment at the end position, focusing on the strong contraction in your upper back. Slowly and with control, return your arms to the starting position. Do not let the band snap back.
Key Insight: The magic of the pull-apart happens in the squeeze and the slow, controlled return. The eccentric (returning) phase of the movement is just as important as the pull itself for building muscle and control.
Modifications and Progressions
- Beginner (Easier Resistance): Start with the lightest resistance band you have. You can also place your hands wider on the band to reduce the tension, making the movement more manageable.
- Intermediate (Standard Form): Use a medium-resistance band and focus on completing 15-20 high-quality reps per set. This is the sweet spot for muscular endurance and postural correction.
- Advanced (Isometric Holds or Angled Pulls): Increase the challenge by holding the "T" position for 3-5 seconds on each rep. You can also change the angle, pulling the band from a high-to-low or low-to-high diagonal path to target the muscles from different directions.
4. Lateral Raises
If you’re looking to sculpt that classic, strong shoulder shape, the Lateral Raise is non-negotiable. This movement is arguably one of the best shoulder exercises for women because it directly isolates the medial deltoid, the muscle on the very side of your shoulder. Developing this muscle creates the illusion of a narrower waist and contributes to a powerful, balanced physique.
Unlike compound presses that work multiple muscles, the lateral raise is a pure isolation exercise. Its sole purpose is to build shoulder width and definition. This focused approach allows you to build a strong mind-muscle connection, ensuring the side delt does all the work. The movement is relatively simple to learn and safe to perform, making it highly effective for both beginners and advanced lifters.
How to Perform a Lateral Raise
Proper form is everything with lateral raises. The goal is to lift with your shoulder muscles, not momentum. Start with a lighter weight than you think you need to master the technique.
What You'll Need:
- A pair of light dumbbells (water bottles or canned goods can work in a pinch)
Step-by-Step Instructions:
- Get into Position: Stand with your feet shoulder-width apart, holding a dumbbell in each hand at your sides with a neutral grip (palms facing your body). Maintain a slight bend in your knees and elbows.
- Engage Your Core: Brace your core to keep your torso stable and prevent any swinging or rocking motions. Keep your chest up and shoulders pulled back and down.
- The Raise: Leading with your elbows, slowly lift the dumbbells out to your sides. Keep a slight bend in your elbows throughout the movement. Continue raising until your arms are parallel to the floor.
- The Descent: Pause for a moment at the top, then slowly lower the dumbbells back to the starting position with full control. The lowering phase is just as important as the lift.
Key Insight: Think of pouring a glass of water out at the top of the movement by slightly tilting your pinkies up. This subtle cue helps ensure your medial deltoid is the primary mover, not your front deltoid.
Modifications and Progressions
- Beginner (Seated Lateral Raises): Performing the exercise while seated on a bench or chair eliminates your ability to use your legs for momentum, forcing your shoulders to do all the work.
- Intermediate (Band Lateral Raises): Use a resistance band by standing on the middle of it and holding the ends. This provides accommodating resistance, meaning the tension increases as you lift.
- Advanced (Leaning Lateral Raise): Hold onto a stable object (like a squat rack or pole) with one hand and lean your body away. Perform the raise with the other arm. This changes the angle and increases the range of motion, placing more tension on the muscle.
5. Face Pulls
If there's one exercise that should be non-negotiable for shoulder health, it's the face pull. Often overlooked in favor of heavy pressing, this movement is one of the best shoulder exercises for women because it directly counters the effects of modern life, like slouching over a desk or phone. It strengthens the often-neglected muscles of the upper back and the back of your shoulders, promoting better posture and building a strong foundation for a healthy, resilient shoulder girdle.
Face pulls are a staple in both rehabilitation and high-performance training programs. They specifically target the posterior deltoids (rear shoulders), rhomboids, and external rotators of the rotator cuff. Strengthening these muscles helps pull the shoulders back into proper alignment, reducing the risk of impingement and creating a balanced, sculpted look.
How to Perform a Face Pull
Proper form is crucial to target the right muscles and avoid turning this into a generic rowing motion. Focus on the mind-muscle connection, feeling the squeeze between your shoulder blades.
What You'll Need:
- A cable machine with a rope attachment
- OR a resistance band anchored at chest height
Step-by-Step Instructions:
- Set Up: Adjust the cable pulley to chest or forehead height. Grab the ends of the rope with an overhand grip, palms facing down or each other.
- Get into Position: Step back until your arms are fully extended and there is tension on the cable. Stand with your feet shoulder-width apart, knees slightly bent, and core engaged.
- Initiate the Pull: Lead with your hands and pull the rope directly towards your face. As the rope approaches your head, simultaneously pull the handles apart.
- The Squeeze: Finish the movement by externally rotating your shoulders, so your knuckles are pointing toward the ceiling (like a "double biceps" pose). Squeeze your shoulder blades together for a second.
- Controlled Return: Slowly reverse the motion, extending your arms back to the starting position without letting the weight stack slam.
Key Insight: The final "pull-apart and rotate" motion is the most important part of the exercise. This is what activates the small, stabilizing rotator cuff muscles that are critical for shoulder joint integrity.
Modifications and Progressions
- Beginner (Resistance Band Face Pulls): If you don't have a cable machine, a medium-resistance band anchored to a sturdy object works perfectly. This is a great at-home option.
- Intermediate (Half-Kneeling Face Pulls): Performing the exercise from a half-kneeling position (one knee on the ground) increases core stability demands and prevents you from using body momentum.
- Advanced (Add a Pause): To increase the intensity without adding excessive weight, hold the peak contraction (the squeezed position) for 2-3 seconds on every single repetition.
6. Bent-Over Dumbbell Raises (Reverse Flyes)
Often neglected in favor of more visible muscles, the back of the shoulders deserves equal attention, making the bent-over dumbbell raise one of the best shoulder exercises for women. This movement directly targets the posterior deltoids and upper back, crucial areas for creating balanced, strong, and injury-resistant shoulders. Strengthening these muscles is key to improving posture, especially for those who spend hours hunched over a desk or phone.
This exercise strengthens the posterior deltoids (the back of your shoulders) as well as the rhomboids and middle trapezius, muscles responsible for pulling your shoulder blades together. A strong upper back not only creates a sculpted look but also provides the stability needed to perform other lifts safely and effectively.
How to Perform a Bent-Over Dumbbell Raise
Proper form is crucial to isolate the rear deltoids and avoid using momentum from other muscle groups. It's best to start with a lighter weight than you would for an overhead press to ensure you can control the movement through its full range.
What You'll Need:
- A pair of light dumbbells (start with 3-8 lbs)
Step-by-Step Instructions:
- Get into Position: Stand with your feet shoulder-width apart, holding a dumbbell in each hand with a neutral grip (palms facing each other). Hinge at your hips, keeping your back straight and your core engaged, until your torso is nearly parallel to the floor. Allow the dumbbells to hang directly below your chest with a slight bend in your elbows.
- Engage Your Back: Squeeze your shoulder blades together to initiate the movement. This pre-activates the target muscles.
- The Raise: Leading with your elbows, raise the dumbbells out to your sides in a wide arc. Continue until your arms are parallel to the floor. Imagine you are spreading your wings.
- The Return: Slowly and with control, lower the dumbbells back to the starting position. Resist the urge to let gravity take over.
Key Insight: Avoid using momentum by lifting your chest or swinging your arms. The movement should be slow and deliberate, originating from your upper back and rear deltoids, not your lower back or biceps.
Modifications and Progressions
- Beginner (Seated or Incline Bench Variation): Performing the movement while seated and bent over, or while lying face down on an incline bench, provides more stability. This support helps isolate the rear deltoids and prevents you from using your lower back to cheat the movement.
- Intermediate (Standing Bent-Over): The standard version described above requires more core strength and stability, making it a great progression.
- Advanced (Single-Arm Variation): Performing the raise one arm at a time forces your core to work harder to resist rotation and allows you to focus intensely on the mind-muscle connection for each shoulder.
7. Scapular Push-ups (Plus Push-ups)
While it may not look as dynamic as a heavy press, the Scapular Push-up is a secret weapon among the best shoulder exercises for women. This small, controlled movement is not about building massive muscle; it’s about activating and strengthening the foundational muscles that keep your shoulder joint healthy, stable, and mobile. It specifically targets the serratus anterior, a fan-shaped muscle that wraps around your rib cage and is essential for moving your shoulder blade correctly.
This foundational exercise is a staple in gymnastics, CrossFit, and physical therapy programs for its ability to teach scapular control. Strong scapular muscles prevent "winging" of the shoulder blades and are critical for safe and powerful overhead movements, from lifting a suitcase into an overhead bin to performing an overhead press. Neglecting these small stabilizers is a common cause of shoulder impingement and pain.
How to Perform a Scapular Push-up
The goal here is precision, not power. The movement should be slow and deliberate, isolating the action to just your shoulder blades.
What You'll Need:
- Your own bodyweight
- An exercise mat (optional)
Step-by-Step Instructions:
- Get into Position: Start in a high plank position, with your hands directly under your shoulders and your arms straight. Your body should form a straight line from your head to your heels.
- Engage Your Core: Brace your abs and squeeze your glutes to maintain a rigid torso. Your lower back should not sag.
- The Retraction: Without bending your elbows, allow your chest to sink toward the floor by squeezing your shoulder blades together. Imagine you are trying to pinch a pencil between them.
- The Protraction (The "Plus"): Powerfully press through your palms and round your upper back, pushing your shoulder blades as far apart as possible. Think about pushing the floor away from you. This completes one repetition.
Key Insight: Your arms must remain locked out and straight throughout the entire movement. The only thing that should be moving is your shoulder blades. If your elbows bend, you are turning the exercise into a regular push-up.
Modifications and Progressions
- Beginner (Quadruped Scapular Push-ups): Perform the exercise on all fours (hands and knees). This reduces the load and allows you to master the mind-muscle connection with your scapular muscles.
- Intermediate (Incline Scapular Push-ups): Place your hands on a bench or sturdy table to perform the movement at an incline, which is less challenging than a full plank.
- Advanced (Decline or Weighted Scapular Push-ups): Elevate your feet on a box to increase the difficulty. For an even greater challenge, a fitness professional can carefully place a light weight plate on your upper back.
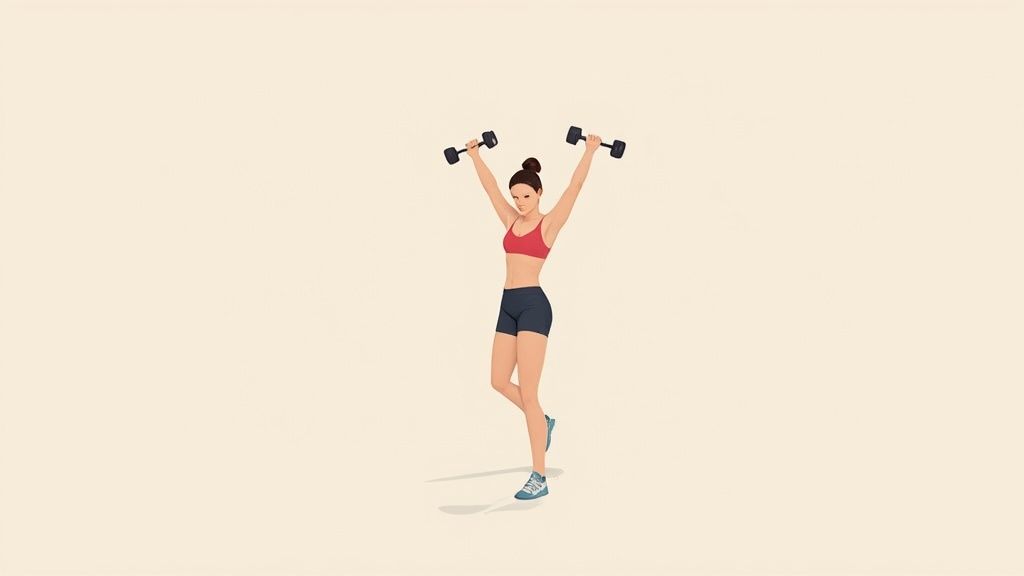
8. Overhead Plate Holds and Carries
While many exercises focus on movement, sometimes the biggest challenge is stillness under load. The Overhead Plate Hold and Carry is a standout among the best shoulder exercises for women because it builds exceptional stability and endurance in a way that dynamic lifts cannot. This functional movement strengthens your shoulders for real-world tasks, like lifting a heavy suitcase into an overhead bin or holding a child up to see a parade.
This exercise is a test of total-body tension and mental grit. It primarily targets the medial and anterior deltoids, but its true power lies in how it forces the entire shoulder girdle, including the rotator cuff and scapular stabilizers, to work in unison to keep the weight steady. Your core, traps, and upper back are also heavily engaged, making it a surprisingly comprehensive upper-body builder.
How to Perform an Overhead Plate Hold
To get the most out of this exercise, start with a light weight you can control with perfect form. The goal is stability, not just lifting the heaviest plate possible.
What You'll Need:
- A single weight plate (a dumbbell or kettlebell also works)
Step-by-Step Instructions:
- Get into Position: Stand with your feet shoulder-width apart. Hold a weight plate with both hands, gripping it on the sides (at the 3 and 9 o’clock positions).
- Engage Your Core: Before lifting, brace your abdominal muscles as if you’re about to be punched in the stomach. Squeeze your glutes to create a stable base.
- The Lift: Press the plate straight overhead until your arms are fully extended but not locked out. Your biceps should be roughly in line with your ears. Keep your shoulders down and away from your ears; don't shrug.
- The Hold: Maintain this overhead position, focusing on keeping the plate perfectly still. Breathe steadily and keep your core tight to prevent your lower back from arching. Hold for a set amount of time (e.g., 20-30 seconds).
Key Insight: Avoid arching your lower back. If you find your ribcage flaring out and your back arching, the weight is too heavy or your core is not engaged enough. This is a common mistake that shifts the load to your spine instead of your shoulders.
Modifications and Progressions
- Beginner (Seated Hold): Perform the hold while sitting on a sturdy bench or box. This takes your lower body out of the equation, allowing you to focus purely on shoulder and core stability.
- Intermediate (Standing Hold): Master the standard standing hold for 30-45 seconds before moving on.
- Advanced (Overhead Carry): Once you can hold the weight with stability, progress to the carry. Hold the plate overhead and walk a set distance (e.g., 20-30 yards). This dynamic challenge forces your stabilizing muscles to work overtime to counteract the subtle shifts in balance with each step.
Next Steps: Putting It All Together
You now have a complete toolkit of the best shoulder exercises for women. The key isn't to do all eight at once, but to choose a few that feel right for you and perform them consistently.
Building Your Bare Essentials Routine
Here’s a simple, actionable framework to get started:
- Pushing: Dumbbell Shoulder Press or Push-up variation.
- Side/Rear: Lateral Raises or Bent-Over Raises.
- Health/Posture: Face Pulls or Band Pull-Aparts.
- Aim for Quality Reps: For each exercise, perform 2-3 sets of 8-15 repetitions. The last couple of reps should feel challenging, but your form should never break down.
- Stay Consistent: Add this routine to your schedule twice a week, with at least one day of rest in between for your shoulders to recover and grow stronger.
- Perfecting your form on each rep.
- Completing more reps than you could last week.
- Feeling more confident and in control during the exercises.
Tracking Progress and Staying Motivated
Remember that progress isn't just about lifting heavier weights. It’s also about:
Celebrate these small victories—they are the building blocks of long-term success. As you challenge your muscles, remember to support them with good nutrition and sleep. If you want to dive deeper into recovery, you can explore the best supplements for muscle recovery to aid your body's repair process.
Your fitness journey is uniquely yours. Embrace the process, stay consistent, and take pride in the strength you are building, one rep at a time.
Ready to take the next step with expertly designed, minimal-equipment workout plans? Visit barefitness.com for guided programs and resources that fit your busy life. Let us help you unlock your full potential with simple, effective fitness you can do anywhere.
More from
Lifestyle
category