You’ve mastered the plank and aced the sit-up. Now what? If your core routine has started to feel less like a challenge and more like a warm-up, it’s time to level up. Building a truly powerful and functional midsection requires moving beyond endless crunches and into movements that demand total body control, stability, and serious strength. This is where advanced ab exercises come into play.
Welcome to Bare Fitness, where we believe in the bare essentials for maximum results. This guide is your next step toward building a core that’s not just for show but is the powerhouse behind every movement you make. We’re diving deep into eight of the most effective and challenging abdominal exercises designed to push your limits. We'll break down each movement with our classic Bare Fitness approach: step-by-step instructions, minimal equipment needs, and actionable tips to ensure you perform them safely and effectively.
Ready to unlock a new level of core strength and redefine what you thought your abs were capable of? Let's get started.
What You'll Need
We're focusing on movements that deliver incredible results with minimal gear. For this guide, you'll need:
- A stable bench or sturdy, low object (like a heavy couch)
- An ab wheel (optional, but highly recommended)
- A pull-up bar (or a sturdy tree branch or playground bar)
- Resistance bands (a versatile, low-cost tool)
- Optional: A weighted vest, ankle weights, or a single dumbbell/plate for adding resistance.
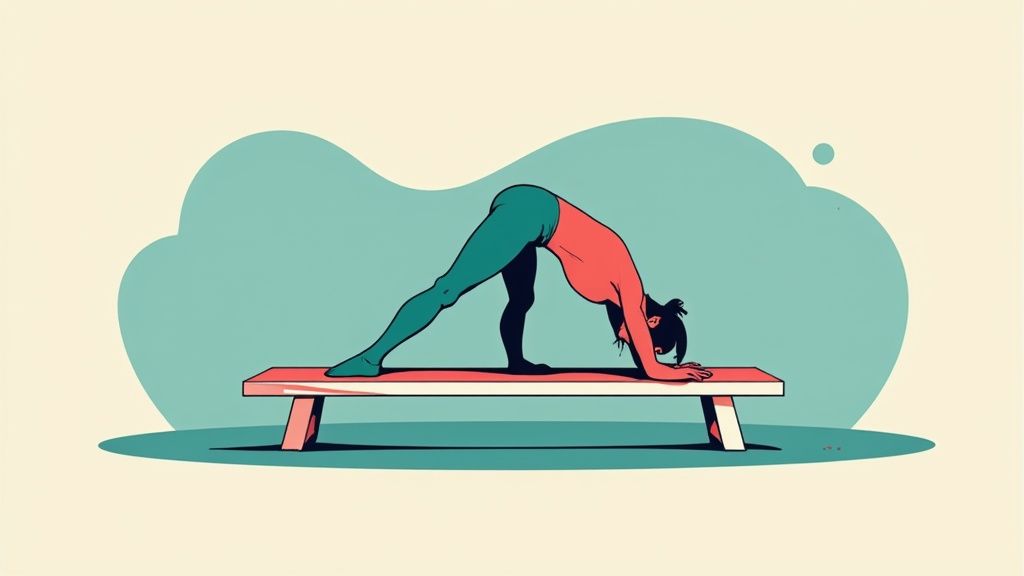
1. Dragon Flags
Popularized by the legendary martial artist Bruce Lee, the Dragon Flag is one of the most demanding and effective advanced ab exercises you can perform. It’s a full-body movement that requires immense core strength, stability, and control. Unlike crunches that isolate small sections of your abs, this exercise challenges your entire core, including the rectus abdominis, obliques, and the deep transverse abdominis, while also engaging your lats, glutes, and lower back.
The goal is to lower your entire body, from shoulders to toes, in one rigid line and then raise it back up, pivoting from your upper back. This creates an intense eccentric (lowering) and concentric (lifting) load, building unparalleled core strength.
Step-by-Step Instructions
- Setup: Lie on your back on a stable, flat bench or the floor. Reach behind your head and grab the sides of the bench or a sturdy, unmovable object like a squat rack pole or the leg of a heavy sofa.
- Starting Position: Pull your knees toward your chest and perform a reverse crunch, lifting your hips and lower back off the bench. Extend your legs straight up toward the ceiling, creating a straight line from your shoulders to your feet. Your weight should be resting on your upper back and shoulders.
- The Descent (Lowering Phase): Brace your entire core. Slowly lower your body in a perfectly straight line toward the bench. Do not let your hips sag or your back arch. Control is key here; the slower you go, the more you will engage your abdominals.
- The Ascent (Lifting Phase): Lower your legs until they are just a few inches above the bench, without letting them touch. From this position, use your core strength to pull your body back up to the starting position, maintaining that rigid line.
Common Mistakes to Avoid
- Arching the Lower Back: This is a sign your core isn't quite ready for the full movement. It places stress on your spine. If you feel an arch, stop and try an easier variation.
- Bending at the Hips: The movement should pivot from the shoulders, not the hips. Bending your hips (also known as "piking") takes the tension off your abs.
- Using Momentum: Swinging your legs to get back up defeats the purpose. The Dragon Flag is an exercise in pure strength and control.
How to Progress
This is a highly advanced movement. Very few people can perform a full Dragon Flag on their first try, and that's completely normal.
- Just Starting Out (Beginner): Start with Dragon Flag negatives. From the top position, focus only on lowering your body as slowly and with as much control as possible. Once at the bottom, reset and repeat. This builds crucial eccentric strength.
- Building Strength (Intermediate): Try tucked Dragon Flags. Instead of keeping your legs straight, keep your knees tucked into your chest. This shortens the lever and reduces the difficulty.
- Ready for a Challenge (Advanced): Once you master the standard Dragon Flag, you can add ankle weights for an even greater challenge.
2. Ab Wheel Rollouts
The ab wheel rollout is a fantastic core exercise, and it’s a staple in our Bare Fitness routines for a reason. This movement is one of the most effective advanced ab exercises for building a rock-solid and defined midsection. By extending your body to its full length, you force your core to resist spinal extension, creating immense strength.
This exercise builds not only strength but also core stability that translates directly to improved performance in other exercises and daily activities.
Step-by-Step Instructions
- Setup: Kneel on a mat or soft surface with an ab wheel in front of you, gripping the handles firmly.
- Starting Position: Position your shoulders directly over your wrists. Engage your lats, brace your core by pulling your belly button toward your spine, and slightly round your upper back. Squeeze your glutes to stabilize your pelvis.
- The Descent (Lowering Phase): Keeping your arms straight, slowly and with full control, roll the wheel forward. Allow your hips to drop toward the floor as your torso lengthens, maintaining a tight, braced core.
- The Ascent (Lifting Phase): Roll out as far as you can without letting your lower back arch or your hips sag. Pause briefly, then forcefully use your abs and lats to pull the wheel back toward your knees, returning to the starting position.
Common Mistakes to Avoid
- Arching the Lower Back: This is the most critical error. It shifts the load from your abs to your spine. If you can't maintain a flat back, you've rolled out too far.
- Sagging Hips: Letting your hips drop first breaks the straight line from your knees to your head, disengaging the core. Your whole torso should move as one unit.
- Using Only Your Arms: While your lats are involved, the primary driver for the return trip should be a powerful abdominal contraction, not just pulling with your arms.
How to Progress
The goal is always perfect form. Adding resistance to flawed movement patterns only reinforces bad habits.
- Just Starting Out (Beginner): Perfect the standard ab wheel rollout from your knees. Focus on achieving full range of motion with impeccable control for at least 10-12 reps.
- Building Strength (Intermediate): Progress to performing rollouts from your feet. This significantly increases the difficulty and serves as a bridge to adding external weight.
- Ready for a Challenge (Advanced): Add a weighted vest. A 10-pound vest is a great starting point. Once you can complete multiple sets with perfect form, gradually increase the load.
3. Decline Weighted Sit-ups with Rotation
This exercise takes the classic sit-up and transforms it into one of the most effective advanced ab exercises for building a powerful core. By performing it on a decline, you increase the range of motion and place your abs under constant tension. Adding both weight and a rotational twist targets the rectus abdominis and obliques simultaneously.
This movement helps build rotational strength and deep core stability, which is useful in sports like golf and tennis, or even just for carrying groceries safely.
Step-by-Step Instructions
- Setup: Secure your feet at the top of a decline bench set to a 30-45 degree angle. Hold a weight (a dumbbell or weight plate) across your chest.
- Starting Position: Lie back fully so your torso is parallel with the bench. Keep your core tight and your chest up.
- The Ascent (Lifting Phase): Exhale and contract your abs to lift your torso off the bench. As you approach the top of the sit-up, twist your torso to one side, bringing your opposite elbow toward the outside of your knee.
- The Descent (Lowering Phase): In a slow and controlled manner, untwist your torso and lower yourself back to the starting position. Inhale as you descend. Alternate sides with each repetition.
Common Mistakes to Avoid
- Pulling on Your Neck: If you prefer holding the weight behind your head, do not use your hands to yank your head forward. This puts dangerous strain on your neck.
- Using Momentum: Swinging your upper body to get up relies on your hip flexors, not your abs. Focus on a controlled, deliberate tempo.
- Rounding the Shoulders: Keep your chest proud and your back straight at the top of the movement. Hunching over can limit oblique engagement.
How to Progress
This exercise is highly scalable, making it a staple in any long-term core training plan.
- Just Starting Out (Beginger): Start with no weight. Master the decline sit-up with rotation using only your body weight. You can also reduce the angle of the decline to make it easier.
- Building Strength (Intermediate): Use a light weight (5-10 lbs) held at your chest. This is easier to control than holding a weight behind your head.
- Ready for a Challenge (Advanced): Increase the weight or the decline angle. For an extreme challenge, hold the weight with your arms extended straight out in front of you.
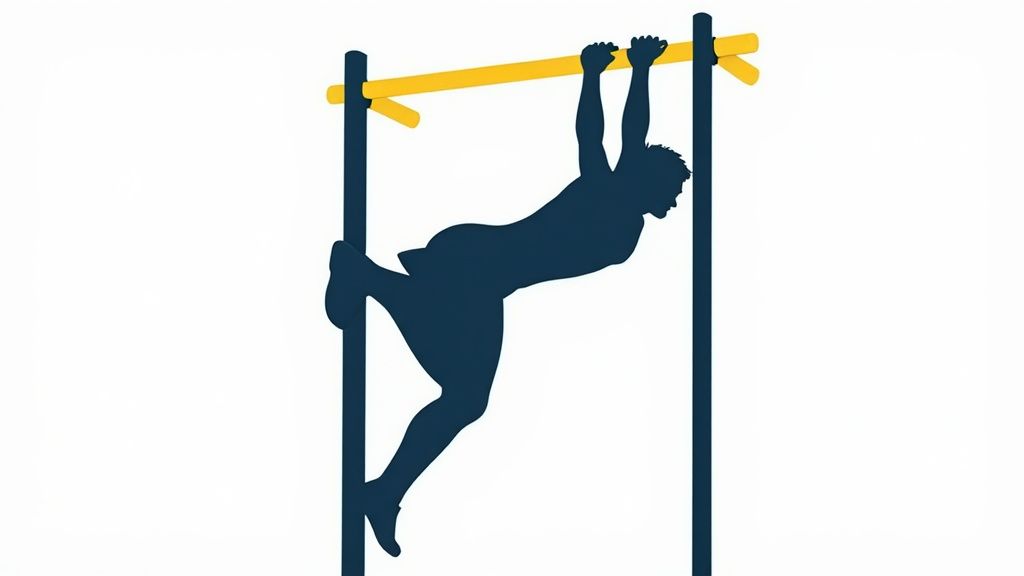
4. Hanging Leg Raises
A staple in calisthenics, the Hanging Leg Raise is a powerhouse among advanced ab exercises. This movement goes far beyond standard floor work by forcing your core to stabilize your entire body against gravity while simultaneously performing a difficult lift. It challenges your rectus abdominis (the "six-pack" muscles), lower abs, and hip flexors with incredible intensity.
This exercise demands a strong grip and a stable core, making it a functional test of total upper body and abdominal strength. It's a fantastic, equipment-minimal way to build true, functional strength.
Step-by-Step Instructions
- Setup: Grasp a pull-up bar with an overhand grip, slightly wider than your shoulders. Let your body hang with your arms and legs fully extended. Engage your lats and shoulders to create a stable base.
- Starting Position: Brace your core and glutes to minimize any swinging. Your body should be in a straight, still line.
- The Ascent (Lifting Phase): Without using momentum, use your lower abs to pull your legs up. Keep your legs as straight as possible and aim to raise them until they are parallel to the floor (or higher!).
- The Descent (Lowering Phase): Slowly and deliberately lower your legs back to the starting position. Fight the urge to let them drop. The control on the way down is just as important as the lift itself.
Common Mistakes to Avoid
- Excessive Swinging: Using momentum by swinging your body is the most common mistake. This takes the tension off your abs. Focus on a strict, muscle-driven movement.
- Not Using Full Range of Motion: Failing to bring the legs high enough limits the engagement of the lower abdominals. Aim to bring your legs at least parallel to the floor.
- Losing Core Tension: Allowing your lower back to arch at the bottom of the movement disengages your core. Keep your core tight throughout.
How to Progress
Hanging leg raises are highly scalable, which is perfect for building strength progressively at home or at the park.
- Just Starting Out (Beginner): Start with hanging knee raises. Focus on simply tucking your knees to your chest with a slow, controlled tempo. This is a great way to build foundational strength.
- Building Strength (Intermediate): Progress to the straight-leg hanging raises described above. Aim for perfect form.
- Ready for a Challenge (Advanced): Once you can perform 10-12 clean straight-leg raises, you can add ankle weights or hold a light dumbbell between your feet for a significant new challenge.
5. Pallof Press
While many advanced ab exercises focus on crunching or lifting, the Pallof Press targets a crucial, often-neglected core function: anti-rotation. This exercise, done with a simple resistance band, trains your core to resist twisting forces, which is essential for stabilizing the spine and preventing injury.
The goal is to hold a resistance band at your chest and press it straight out, fighting the urge to let the resistance twist your torso. This builds immense isometric strength in the obliques and deep core muscles.
Step-by-Step Instructions
- Setup: Anchor a resistance band to a sturdy object (like a doorknob or pole) at chest height. Stand perpendicular to the anchor point.
- Starting Position: Step away from the anchor to create tension. Stand with your feet shoulder-width apart, knees slightly bent, and core engaged. Hold the band handle with both hands directly in the center of your chest.
- The Press: Brace your glutes and core. Slowly press the handle straight out in front of you until your arms are fully extended. The resistance will try to pull you back toward the anchor; your job is to resist this with all your might.
- The Hold: Hold this fully extended position, maintaining a rigid posture. Do not allow any rotation in your hips or torso. Hold for the prescribed time before slowly returning the handle to your chest with control. Complete all reps on one side before switching.
Common Mistakes to Avoid
- Rotating the Torso: The entire point is to prevent rotation. If you feel your torso twisting toward the anchor, the resistance is too heavy or you need to stand a little closer.
- Leaning Away from the Anchor: Your body should remain upright. Leaning your torso to counterbalance the weight takes the focus off your core.
- Shrugging the Shoulders: Keep your shoulders down and relaxed. Shrugging introduces tension into your neck.
How to Progress
This exercise is incredibly versatile and can be scaled for nearly any fitness level.
- Just Starting Out (Beginner): Start with lighter resistance and shorter holds (15-20 seconds). You can also perform the exercise from a kneeling position to increase stability.
- Building Strength (Intermediate): Increase the hold time to 45-60 seconds or add a slow, controlled press in and out for reps.
- Ready for a Challenge (Advanced): To make this one of the most challenging advanced ab exercises, try it from a single-leg stance to challenge your balance and stability further.
6. Ab Wheel L-Sit Hold Transitions
Merging the dynamic instability of the ab wheel with the static tension of an L-sit creates one of the toughest advanced ab exercises you can do. This movement combines a rollout with an isometric hold, demanding exceptional core strength, hip flexor endurance, and total-body control. It’s an exercise that leaves no part of your midsection unchallenged.
The goal is to roll out on the ab wheel while simultaneously lifting your straight legs into an L-sit position, holding that tension before returning. This dynamic transition forces your entire core to work overtime.
Step-by-Step Instructions
- Setup: Kneel on a mat with an ab wheel directly in front of you. Place your hands firmly on the handles.
- Starting Position: Engage your core and glutes, keeping your back flat. Begin rolling the wheel forward.
- The Transition and Hold: As you roll out, simultaneously lift your straight legs off the floor in front of you, forming an "L" shape with your body. Hold this extended L-sit position for a 1-3 second count, maintaining extreme core tension.
- The Return: With control, lower your legs and use your lats and core to pull the ab wheel back toward your knees.
Common Mistakes to Avoid
- Arching the Lower Back: This is the most common and dangerous mistake. If your hips sag, your core has given out. The movement must be stopped immediately.
- Using Hip Flexors Only: While hip flexors are involved, the primary work of stabilization should come from your abs. If you only feel it in your hips, focus on bracing your core more intensely.
- Rushing the Movement: This is not an exercise for speed. Each phase, especially the hold, requires deliberate control.
How to Progress
This is a peak-level exercise that requires building a significant strength foundation. Please do not attempt this without mastering the prerequisites.
- Just Starting Out (Beginner): Master standard ab wheel rollouts from your knees, and practice floor L-sits independently. Hold a floor L-sit for at least 20-30 seconds before attempting to combine the moves.
- Building Strength (Intermediate): Start with Tucked Ab Wheel Holds. As you roll out, tuck your knees toward your chest instead of extending your legs. This shortens the lever and prepares your core for the load.
- Ready for a Challenge (Advanced): Once you can perform the full movement, work on increasing the hold time at the point of full extension or attempt the exercise starting from your feet for the ultimate challenge.
7. Weighted Crunches on a Decline Bench
Taking a classic exercise and adding a powerful twist, Weighted Crunches on a decline bench are a fantastic way to sculpt and strengthen your abdominals. The decline position puts your abs under constant tension, and adding weight provides the progressive overload needed to build muscle.
This exercise intensely targets the rectus abdominis, particularly the upper portion, while also engaging the obliques for stability. It's a simple, effective way to take your crunches to the next level.
Step-by-Step Instructions
- Setup: Adjust a decline bench to a 30-45 degree angle. Secure your feet firmly under the pads. Hold a weight plate or dumbbell across your chest.
- Starting Position: Lie back completely so your torso is parallel with the bench. Place your hands crossed over your chest holding the weight. Engage your core before starting.
- The Ascent (Lifting Phase): Exhale and forcefully contract your abs to lift your shoulders and upper back off the bench. Focus on curling your ribcage toward your pelvis.
- The Descent (Lowering Phase): Inhale and slowly lower your torso back to the starting position with full control. Resist the pull of gravity. Maintain tension in your abs throughout the entire set.
Common Mistakes to Avoid
- Pulling on Your Neck: It's best to hold the weight at your chest to avoid the temptation to place hands behind your head and pull on your neck.
- Using Momentum: Swinging your upper body up is a common cheat. The movement should be deliberate and powered entirely by your abdominal muscles.
- Resting at the Bottom: Letting your shoulders rest on the bench between reps releases the tension from your abs. Keep the tension constant for maximum effect.
How to Progress
The key to this exercise is progressive overload—gradually making it more challenging over time.
- Just Starting Out (Beginner): Start with standard decline crunches with just your bodyweight. Master this before adding resistance.
- Building Strength (Intermediate): Begin with a light weight (5-10 lbs). Focus on performing 12-15 perfect, controlled reps.
- Ready for a Challenge (Advanced): Gradually increase the weight as you get stronger. You can also increase the angle of the decline bench to make the exercise even more demanding.
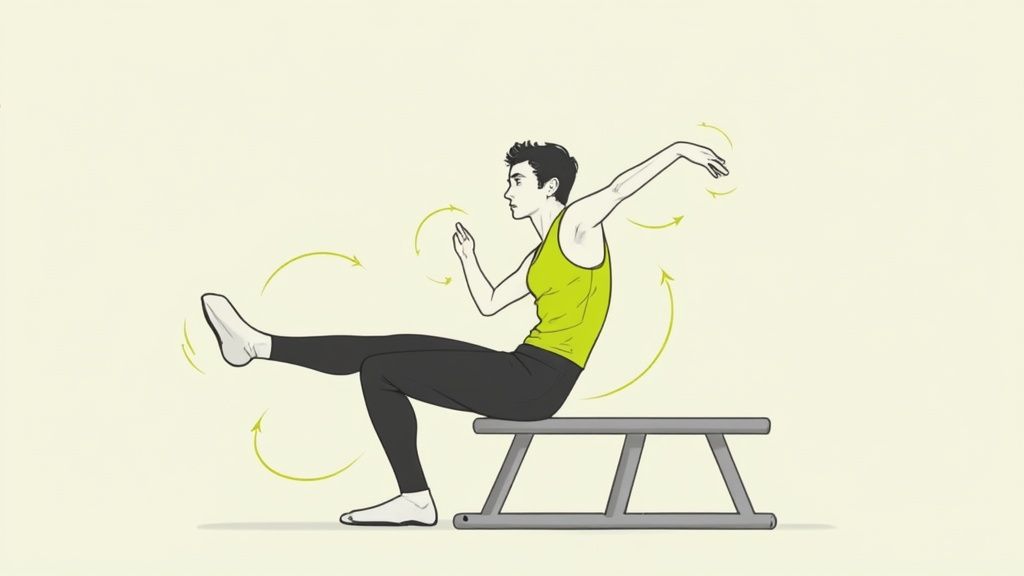
8. Windshield Wipers
Popular in the calisthenics community, Windshield Wipers are a phenomenal exercise for building rotational strength and oblique definition. This is one of the most dynamic advanced ab exercises you can perform, combining a hold with a powerful, controlled swinging motion. The movement targets the entire abdominal wall, with a special emphasis on the obliques and lower abs.
You can perform this exercise hanging from a pull-up bar or lying on the floor, making it very accessible. The goal is to keep your legs straight and rotate them from side to side like a windshield wiper.
Step-by-Step Instructions (Floor Version)
- Setup: Lie on your back on the floor with your arms extended out to your sides in a "T" shape to stabilize your body.
- Starting Position: Lift your legs straight up toward the ceiling, keeping them together. Your body should form an "L" shape.
- The Movement (Side-to-Side): Keeping your legs straight and together, slowly and deliberately lower them to one side. Control the movement with your obliques, going only as far as you can without your opposite shoulder lifting off the floor.
- The Return: Use your core strength, not momentum, to pull your legs back to the center position. Then, repeat the movement to the opposite side. One full rotation from side to side completes one rep.
Common Mistakes to Avoid
- Bending the Knees: Allowing your knees to bend significantly takes the tension off your lower abs. Strive to keep your legs as straight as possible.
- Using Momentum: Swinging your legs wildly without control is the most common mistake. This negates the abdominal engagement. The movement should be deliberate and powered by your core.
- Shoulders Lifting Off the Floor: If your shoulders lift, you've gone too far. Reduce the range of motion to keep the tension on your core.
How to Progress
This exercise demands a strong foundation. Rushing into it is a recipe for poor form.
- Just Starting Out (Beginner): Begin with bent-knee Windshield Wipers. Perform the exercise with your knees bent at a 90-degree angle. This shortens the lever and allows you to build the necessary rotational control.
- Building Strength (Intermediate): Perform the straight-leg version as described above. Focus on control and increasing your range of motion over time.
- Ready for a Challenge (Advanced): Try the hanging version from a pull-up bar. This adds the challenge of grip strength and full-body stabilization, making it a truly elite core movement.
Putting It All Together: Your Next Steps to Core Mastery
You’ve explored a challenging lineup of movements. Moving beyond basic crunches and planks is a significant step in your fitness journey. This collection of advanced ab exercises isn't just about chasing a six-pack; it's about building a functionally powerful, stable, and resilient core that supports every other movement you make.
The true takeaway is that advancement is defined by progressive overload, great form, and intentional muscle engagement. Each exercise we covered targets your core in a unique way, helping you build deep, integrated strength that prevents injury and enhances performance.
Your Action Plan for Core Progression
So, where do you go from here? Let's create a clear, actionable path forward.
- Select and Integrate: Don't try to master all eight exercises at once. Choose one or two that feel challenging but achievable. The Pallof Press and Hanging Leg Raises are excellent, accessible starting points. Integrate your chosen movements into your existing routine 2-3 times per week.
- Prioritize Quality Over Quantity: The goal with these advanced ab exercises is not to pump out hundreds of reps. Focus on perfect execution. If the instructions call for 8-12 reps but your form breaks down at 5, then 5 is your number. Record it, and aim for 6 next time. This focus on quality is what builds real strength.
- Listen to Your Body and Prioritize Recovery: Advanced training creates a greater demand for recovery. Soreness is expected, but sharp pain is a signal to stop. Proper rest, nutrition, and hydration are non-negotiable. To truly progress, it's essential to understand how to recover faster after your workouts. This ensures your muscles rebuild stronger.
- Track Everything: Keep a simple log of your workouts. Note the exercise, weight used (if any), sets, reps, and even how it felt. Seeing your numbers improve over weeks and months is a powerful motivator and the clearest indicator that you're getting stronger.
Building an elite core is a marathon, not a sprint. Embrace the challenge, be patient with the process, and celebrate the small wins along the way. The strength you build today will become the foundation for all your fitness goals tomorrow.
Ready to build a complete, effective home workout routine? At barefitness.com, we specialize in programs and guides that deliver maximum results with minimal equipment. Explore our resources to complement your new advanced ab exercises and build a powerful, well-rounded physique right from home.
More from
Lifestyle
category